Lab Notes: Biomaterial Casting
Step Zero: The Standard Non-Stick Mold
Before we can tweak pH or debate plasticizer splits, we need a standardized place to pour the goop.
If you’ve ever tried casting a fresh biomaterial batch into a plastic Tupperware container or a piece of raw plywood, you already know the heartbreak. These materials are aggressively sticky before they cure. Without the right tooling, your sample will bond to the surface, and you’ll spend hours chipping cracked bio-resin off a board.
To actually test and compare recipes, you need a reliable, reusable, flat surface. Here is the exact frame I use.
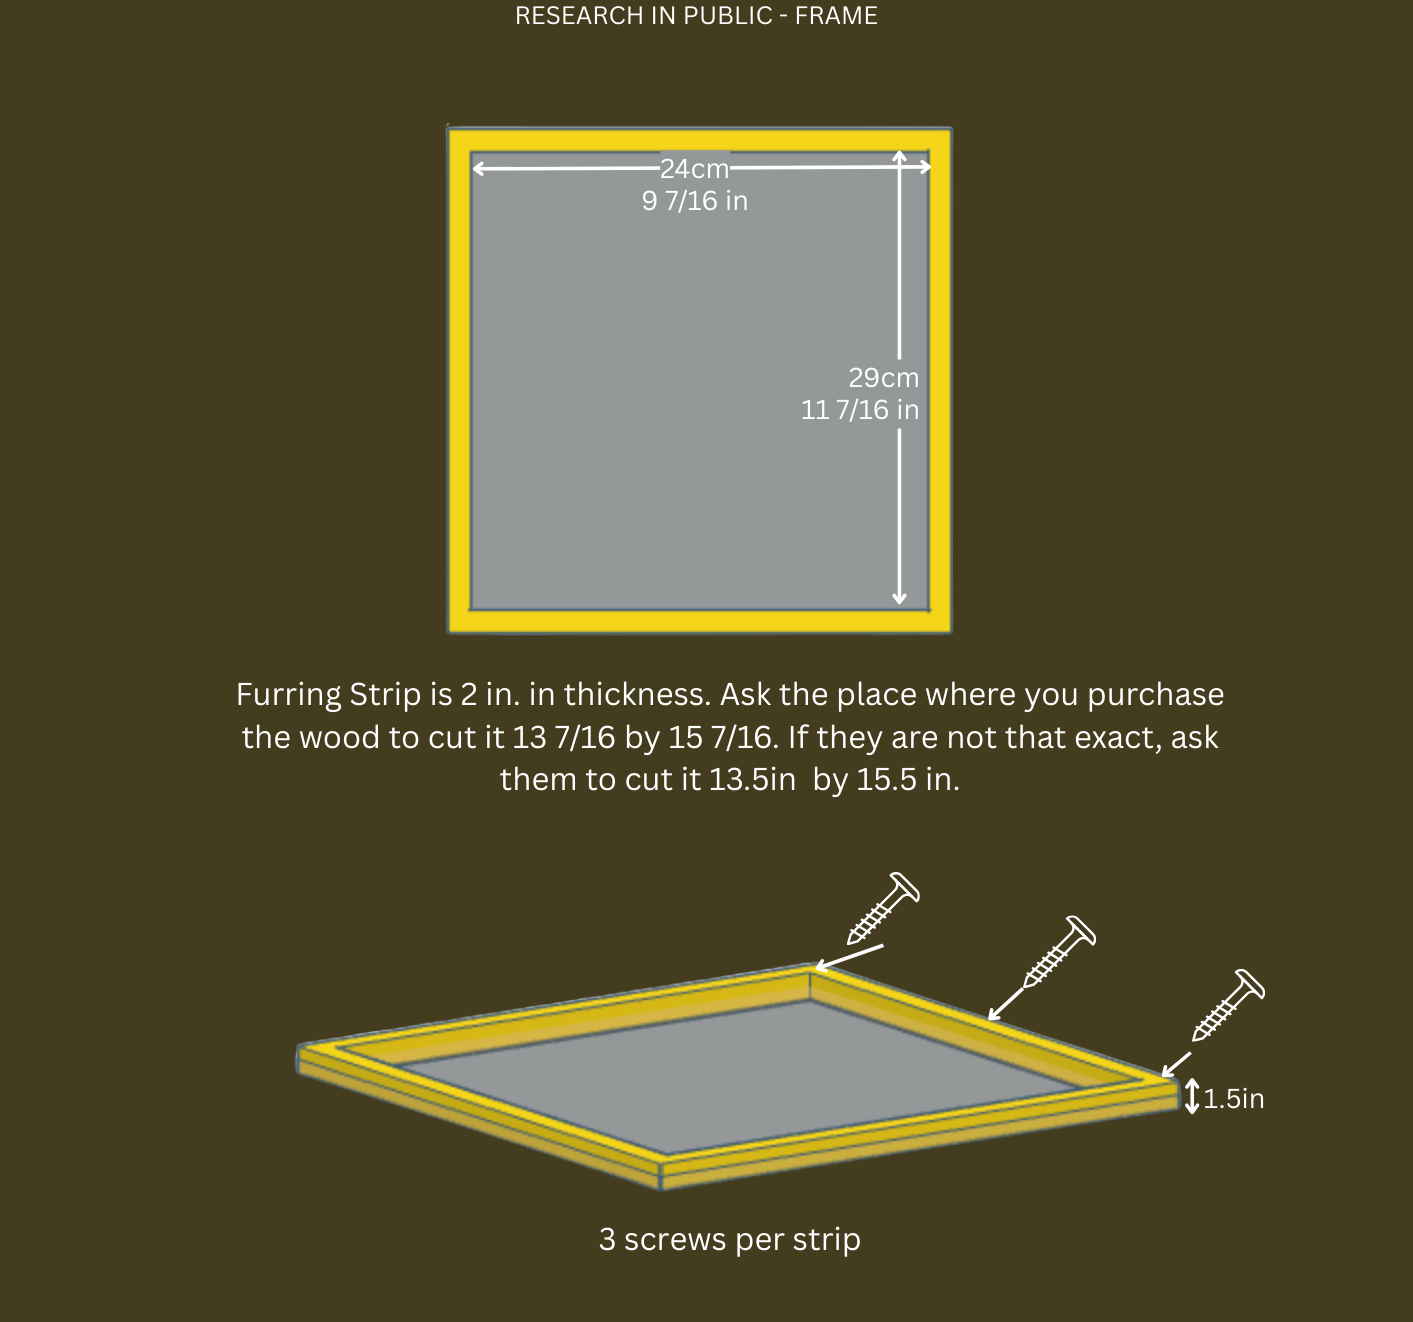
The Hardware (just Home Depot or your local store)
3/4" Melamine Particleboard: This is the non-negotiable base. Melamine has a hard, thermally fused plastic coating. It’s flat, it's cheap, and most importantly, it stops the stick.
1" x 2" Furring Strips: Standard dimensional lumber to create the retaining walls of the mold.
1 ¼" Wood Screws: To hold it all together.
Mineral Oil or Vegetable Oil: Your release agent.
The Build
1. Sizing the Base (Work Smart, Not Hard) Melamine sheets are massive (usually 4ft x 8ft) and heavy. Do not try to cut this down in your living room. Ask the hardware store associate to run it through their panel saw and cut it down to the exact dimensions you want your material sheets to be.
2. Cutting the Walls Measure the perimeter of your freshly cut melamine base. Using a saw, cut your 1x2 furring strips to fit the edges.
Tip: If you can, cut the ends at a 45-degree angle. It creates a tighter corner joint, which stops your liquid bioleather from weeping out onto your table before it sets.
3. Clamp and Pre-Drill (Crucial Breadcrumb) Dry-fit the wooden frame on top of the melamine base and clamp the corners squarely. Do not skip this next part: Melamine particleboard will split if you drive a screw directly into it. Pre-drill a pilot hole through the furring strip and into the base first.
4. Assemble Drive your 1 ¼" wood screws into the pilot holes to lock the walls to the base. Make sure the frame sits completely flush to create a tight seal.
Prep for Casting
Your mold is built, but you can't pour yet. Even with the melamine coating, you need a release agent.
Take a rag, add a tiny splash of oil, and wipe down the entire interior—the white base and the wooden side walls. You are looking for a microscopic barrier, not a greasy puddle.
Your tooling is ready. Next time, we start cooking.